In the three months since I gave birth to my son, I’ve been on a steeeeeep learning curve. Let’s face it: before my pregnancy, I hadn’t practiced the basics like feeding or changing a baby almost since my girlhood when I played with dolls–which don’t move or starve.
So, with a lot of trial and error–and an eye on my checking account–here are some hacks I’ve discovered:
CHANGING
While cloth diapering can be daunting, it does save money! Check out the many numerous resources online to see how to do it, and be on the lookout among your friend-circle for a used set of these diapers, since the initial cost can be steep. Yep, I did say *used* diapers. They wash well – that’s the point!
But if you’re intimidated by cloth diapers, there is another, smaller DIY, cost-saving-approach to diaper changing that is a lot less scary that you could try: making your own wipes. Think about it: how hard could it be? They’re wet, semi-sanitized pieces of layered tissue paper!
Not to mention — pick up a package and look at the ingredients sometime; you might be shocked to see parabens and a lot of other unhealthy chemicals listed as part of the solution in the store-bought wipes. Yikes!
-

- The ingredients…
-

- A half-roll fits best.
-
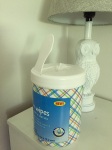
- This is the basic canister I use.
Here’s the recipe for the version I’ve created:
- 1/4 gal. purified nursery water
- 2 TBSP coconut oil (antifungal, anti-yeast/thrush, anti-diaper rash)
- 3 TBSP hydrogen peroxide (for non-stinging antiseptic)
- 1 TBSP baby soap of your choice (I chose the Aveeno, since Zeke’s skin is sensitive!)
- 1 high-quality roll of paper towels
- 1 empty canister-style package of wipes; you can also use a clean coffee can with a hole cut in the lid
- Mix the liquid ingredients into a solution in a CLEAN bowl (bonus: mix it in a pot on the stove that you’ve heated for 10 minutes and have let cool in advance; this makes for an ultra-sanitized mixing environment).
- Cut the roll of paper towels in half using a serrated knife or table saw; remove the cardboard tube in the middle. Set one of the half-rolls aside for later use.
- Soak the half-roll of paper towel in the solution; lift it out and let it drip a bit.
- Place the half-roll into the canister, and pull out the first sheet from the center through the hole in the lid to begin dispensing tear-off wipes. That’s it!
Using this method, you can produce about 200 wipes for roughly $.80. That’s a cost savings of $2.00-3.00 every roll, depending on where you shop. And as a bonus: these ingredients are better for baby than many wipes on the market!
(BREAST)FEEDING
I have always hated pumping, but I have found that it’s useful to have some of my milk collected and frozen for those rare date nights or times when I needed to head into work and leave the baby with my hubby or my mom/mother-in-law. Rather than drag out the pump and all its parts, however, I started a supply hoard by making the most of the leaky, over-production period during weeks 4-8 of the breastfeeding journey by collecting those drips!
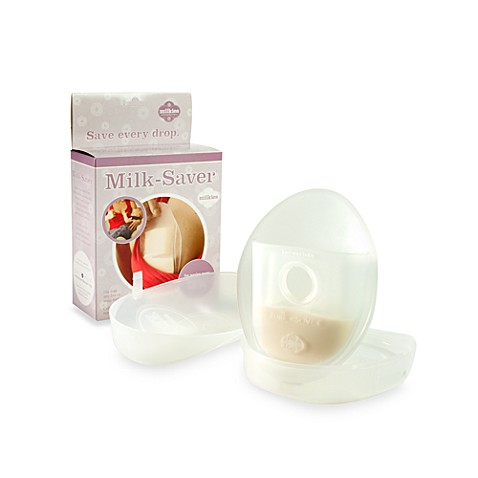
Why pay $28 for milk dripping collectors? That’s just cray-cray.
The DIY steps to making my own milk-collecting bag(s) were pretty easy:
- Before breastfeeding the baby at night when milk production is highest, take a plastic sandwich bag and use masking tape to tape the opening all the way around the areola of the nipple you aren’t offering to the baby at the moment.
- Collect the drips in the bag on that side while baby is feeding from the other.
- Pour the drippings into a freezable milk storage tube/container; keep the container in the fridge until your next feeding. Dispose of the bag.
- Within two feedings (3 hours, at that time of my lactation journey) repeating steps 1-3, you should have close to a full tube (2.5 oz) of collected milk. Go freeze that sucker!
TRAVELING
I had my baby right before the heat of the Dog Days of summer… and that has made hot, sticky car travel somewhat of a pain. Especially since we spent our first three months of his life living in an apartment where our car (and the car seat) was not well protected from the heat of the sun.
To make sure baby Zeke didn’t suffer from discomfort on days when it took a half hour for the air-conditioning to beat the heat, I came prepared with this homemade baby-cooling kit:

What is this, you ask? It’s a gel freezer pack, similar to the kind packed with box lunches and medical supplies for shipping, and one of those super-fuzzy socks your matronly aunt likes to get you for Christmas. I just stuff the freezer pack into the fuzzy sock…and BOOM, instant baby comfort. Cool and soft!
I keep a pair in the freezer, so all I have to do is grab one on the way out the door. This is where I tuck it when we go bye-bye in the car:

That’s a cool and comfy baby, right there.
It’s amazing the difference it makes, and how much time it saves. Now we don’t have to wait for fifteen minutes for the car to cool down completely before taking off. We just pop this thing in his seat for a minute, cooling the spot where his little butt will go, and then we put him in and rest his feet and legs over the sock in a reversal of the old-school warming bricks that people used to use in carriages to beat the winter chill. As you can see here, he rests pretty comfortably on even the hottest days with his little cool-sock.
As a bonus, this washable, portable little cooling system also can slide against his belly when I carry him in a sling or Ergo carrier against my body, keeping both of us cooler!
That’s all my tips for now. I’m still figuring out a lot of this stuff! Please share your discoveries and ideas below!
Best wishes,
Ruth


